Welcome to ButtonShift! Whether you’re trying out the Free Trial or using a Team Plan, we’re glad to have you here. This guide will walk you through everything you need to get started and make the most of our platform. Let’s get started!
Step 1: Create Your Team
First things first, let’s set up your workspace.
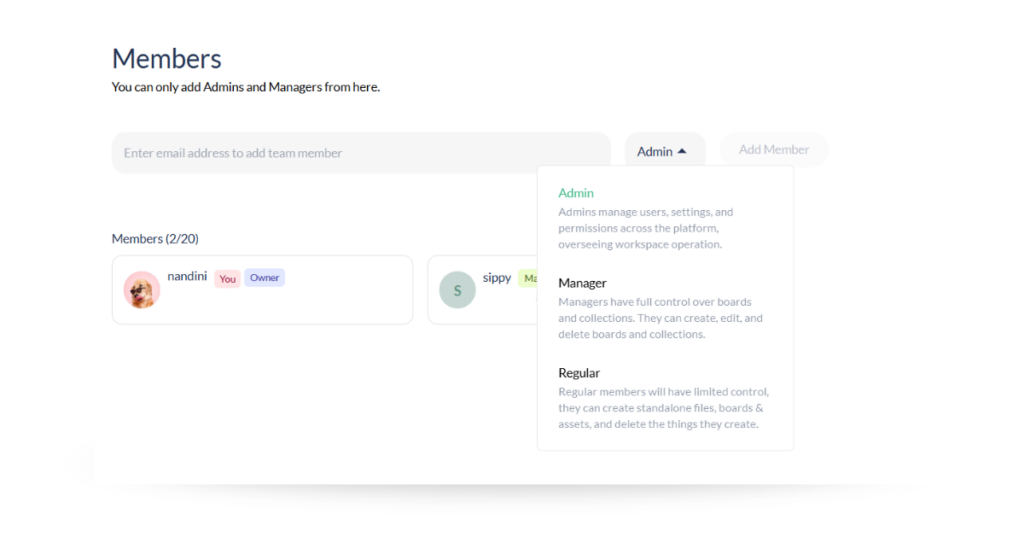
- Add Team Members:
- Head to the Members section and invite your team by entering their email addresses.
- Choose their roles:
- Admin: Manages users, settings, and permissions.
- Manager: Creates, edits, and deletes boards and projects.
- Regular Members: Can create and delete their own files and boards.
Pro Tip: If someone doesn’t receive the invite, ask them to check their spam folder or sign up directly on ButtonShift.com using the same email.
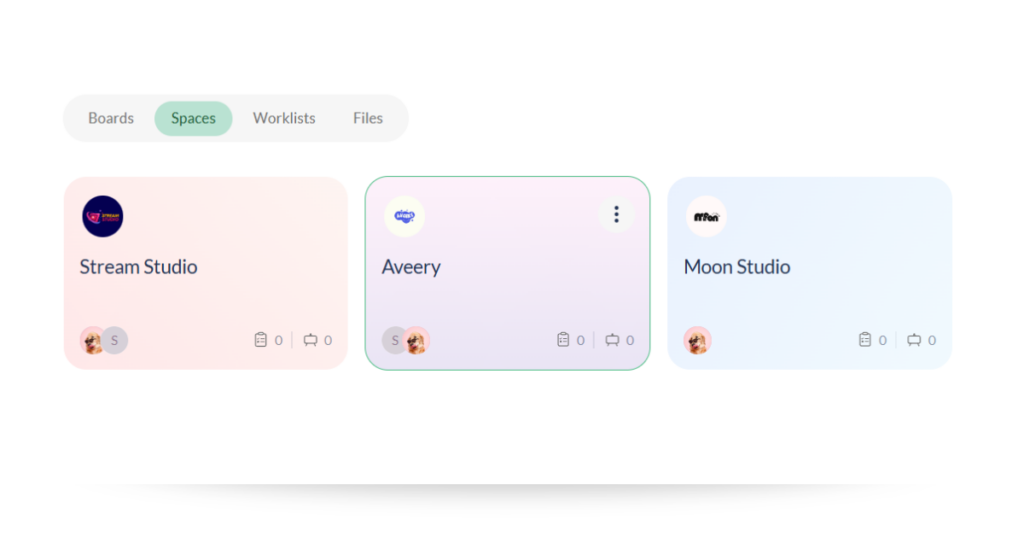
Step 2: Define Spaces & Assign Default Rights
Spaces are like virtual rooms for your clients, teams, or projects. Here’s how to set them up:
- Create a Space:
- Name it something that’ll resonate with your work, like Name of the campaign or name of the client
- Add a logo/image to make it visually distinct.
- Assign Roles:
- Decide who can create boards/projects and assign roles like:
- Approver: Reviews, provides feedback, and approves content.
- Creator: Uploads and submits content.
- Reviewer: Shortlists and provides feedback.
- Viewer: Views and comments on boards/files.
- Collaborator: Uploads content and acts on feedback.
- Decide who can create boards/projects and assign roles like:
Pro Tip: You can always tweak these settings later, so don’t stress too much!
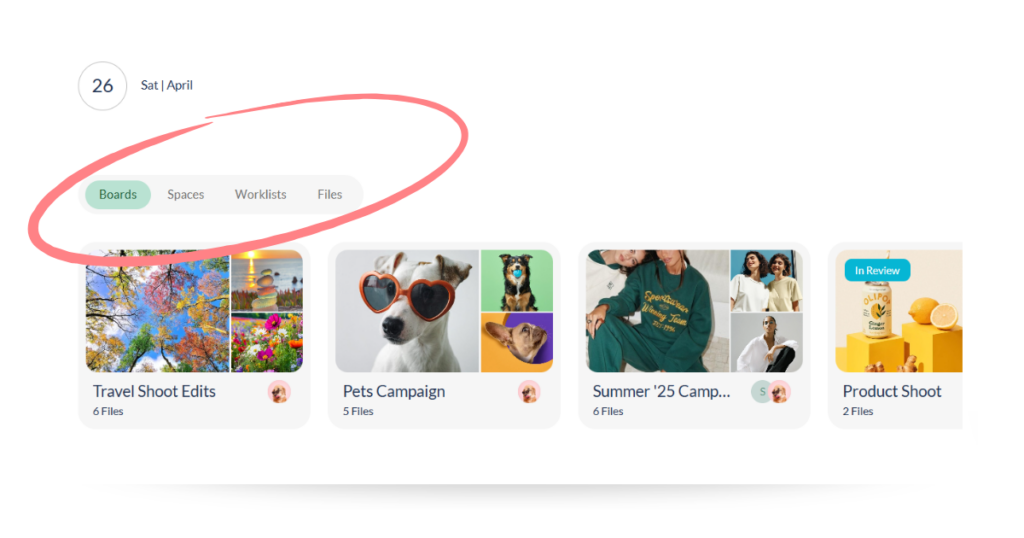
Step 3: Create Boards, Files, or Projects
Now that your Space is ready, it’s time to organize your work.
- Boards:
Upload a group of content (images, videos) and send them for shortlisting, reviews, and approvals. (Not immediately, but you can have a think)
- Collections (Projects):
Group similar boards together to track overall progress. For example, a campaign might have multiple sets of creatives, and each set can be a board under one project (Well, this differs based on your use case, but I’m sure you get the point!)
- Files:
Add standalone files that you may need for reviewing, approving. Perhaps, just add them for feedback?
Pro Tip: You can add non-Space members directly to a board or file without giving them full Space access.
Step 4: Create & Share Assets
Got brand guidelines, logos, or inspiration boards? Turn them into reusable assets!
- Create Assets:
- Store frequently used content like brand guidelines or templates etc.
- Link these assets to Spaces, Boards, or Projects for easy access.
- Organize Assets:
- Use folders to keep things tidy or store external links for quick reference.
Pro Tip: Assets save time and ensure consistency across projects.
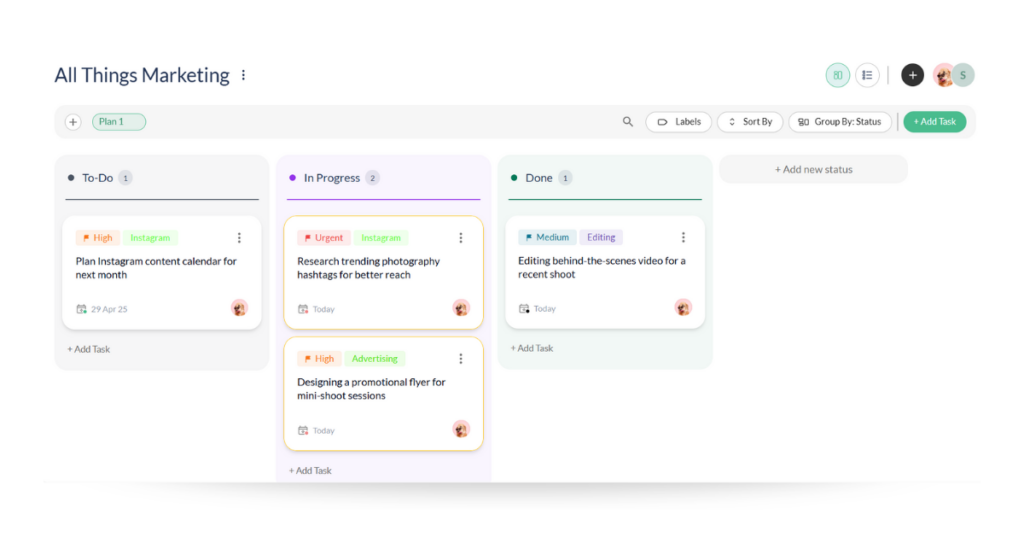
Step 5: Create Worklists to Track Progress
Worklists are your go-to for task management (Well, this is more than your to-do list, you can do so much more. It’s agile – so, you can also manage your campaign plans, sales pipeline, and more.
- Create a Worklist:
- For Example – Name it (e.g., “Social Media Campaign Tasks”) and add a description.
- Assign members and set their access levels:
- Full Access: Create plans, add/remove members, and manage tasks.
- Limited Access: Create, update, and delete tasks.
- Track Progress:
- Use statuses based on your workflow. Understanding that everyone has a different style, we made sure that you can enjoy the workflow of your choice! Also, have a look at those labels – you can use them to mark priority, or you can use them to identify the items in your plan.
Pro Tip: Create Worklists for specific gigs or your entire organization – it’s up to you!
Here’s an article to show how agencies can keep creative projects on track.
Step 6: Let’s Get It Done!
That’s it! You’re all set to streamline your creative workflow with ButtonShift.
- Explore: Play around with Spaces, Boards, and Worklists to see what works best for your team.
- Collaborate: Invite your team, share feedback, and keep everything in one place.
- Track: Use the Timeline/Target dates to monitor progress and stay on top of deadlines.
Need Help?
We’re here for you! If you have any questions or need a quick demo, just reach out.